Wednesday, 22 February 2012

Bedside Table

Next on my list - a bedside cabinet.

This was one of a pair, given to us by my buddy.  It was actually in hubby Dave and I's bedroom, but I decided one will go in Brodie's room, and the other in Lucas's.


It's not massively fun and kid friendly at the moment, but we'll sort that out right now!  First thing to go was the floral pattern over the middle bar.  Bring on the polyfilla!


 Next, the handles.  Sorry, but they're just not "kid" enough for me.  You can see from the next picture, once I took the handles off there were actually two holes in the front of the drawer, but only one going all the way through.  I filled in the "fake" hole, leaving the real hole for the new handle.


Let me just point out - this is not a "themed" bedroom.  There is nothing tying all the pieces and colours together, apart from my intention to make it bright, fun and cosy.  However, saying that, the ONE thing Brodie really wants is a Super Mario mural on his wall.  More on that later, but I wanted to tie in this little cabinet with a Mario theme - I thought the shape was great for doing something like this:


Picture the above on it's side so the brick portion is on the bottom, and the yellow portion is on the top.  This was my cunning plan!

However...


After FOUR coats of yellow paint, it was not looking good (in my own defense, I did sand it like nobodys business before the first coat) - should have primed it, but didn't.  DOH!.  That lovely chocolately brown was NOT loving the yellow.

To add insult to injury, I stupidly assumed that both drawers were the same size (we all know what assuming does, it makes an ass out of YOU and ME, however YOU had no part in this dear reader, it was all ME), so it actually turns out that I painted the bottom drawer yellow instead of the top.  ARGH!  Epic fail, as my son would say.

So, I have decided it is time for plan B.  Paint samples!

I re-sanded all that glossy, yellow paint, and went at it again.  I am on a paint sample roll just now, did you see the bookmarks that the kids made for valentines?  Again, collected over a period of time from different stores.

I started with the drawers.  The one in front is still wet with mod podge in this pic.


 Then on to the main part.  I did the sides and top.  In the shot below, you can see the bottom edge plus the edge on the left still need to be sanded off.


 I tried very hard at all times to keep the white lines between the colours straight, to give it a bit of continuity, and managed pretty well.  I also made sure that all of the samples were the right way up so that you could read all of the paint names without turning upside down.  If you are going to try this yourself, I recommend doing what I did - I did one section at a time (top, side etc) and laid the unit so the side i was working on was facing up - once I had mod podged the surface of the unit and laid the paint samples on, I covered it all with cling film them put lots of heavy books on top for a few hours to keep it flat.

The fiddliest parts were those small sections - the rim around the top, then the three sections above, in the middle and below the drawers.  I thought it was quite apt that the very last piece I put on was called "Scottish Waltz" - it was the first time I had noticed ANY of the names on the whole piece!


I finished it off with wooden handles painted in that same yellow as my first attempt, and painted the legs in the same colour.  You'll notice from the picture above that one of the drawers is still yellow on the edge, while the other is brown.  Adds to the colour, don't you know!  I suppose I could have done the edges too, but I was running out of samples.  Also, I did the "sanding off the edges" technique as seen in my Manga Dresser, but the paint samples are way thicker than comic book pages, and some of the edges were not as neat as I would have liked, so I was just happy to get it looking like this.


I painted the handles seperately, and before I attached them, I gave the whole thing 2 coats of mod podge and 3 coats of spray varnish.

So in the end, no Super Mario tie-in, but Brodie loves it anyway!

Bedside cabinet - free
paint samples - free
yellow paint - from my stash
wooden handles - from my stash
mod podge and varnish - already counted in my total

Total cost of Paint Sample Bedside Cabinet - $0.00

Total cost of room to date - $20.98

A score for Brodie's bedroom makeover, look at this colourful bedside cabinet for ZERO addition to the bedroom total.  Yes please, I'll have some of that!

Nikki x 

P.S.  Don't forget you can follow me of Facebook! 

You can see more about Brodie's bedroom makeover below:
The Bedroom of Doom! - Before the transformation began
The Manga Dresser 

Linked with:
Ginger Snap Crafts - Wow Me Wednesday #39 
Blue Cricket Design - Show and Tell 
Someday Crafts - Whatever Goes Wednesday #105 
The Trendy Treehouse - Create and Share 
Free Pretty Things For You - Whatever You Want Wednesday #65 
DIY by Design - Winter Blues Wednesday, It's a Party #53  
My Girlish Whims - Your Whims Wednesday #47 
Handy Man, Crafty Woman - Wicked Awesome Wednesday #51 
The DIY Dreamer - From Dream to Reality Linky Party #4 
Oopsey Daisy - Wednesday's Wowzers {8} 
Tales of a Trophy Wife - Will Craft For Laughter and Grace 
Seven Thirty Three - Sugar and Spice #99 
House of Hepworths - Hookin Up With HoH #88 
Somewhat Simple - link party 
Tales From Bloggeritaville - Thrifty Thursday #149 
Katie's Nesting Spot - A Crafty Soiree #78 
The Shabby Creek Cottage - Transformation Thursday 
Beyond The Picket Fence - Under $100 Thursday 
Suzy's Artysy-Craftsy Sitcom - Commercial Break Thursday 
Christina's Adventures - 20 Below Thursday #61 
Between U & Me - Crazy Cute Link Party #39 
Thrifty 101 - DIY Thrifty Thursday #55 
The Brambleberry Cottage - Time Travel Thursday #85 
What Allie's Making Now - Making it With Allie 
A Glimpse Inside - Catch a Glimpse Party #68 
Rhinestone Beagle - Doggone Dirty Craftin Link Party #22 
Fabulously Flawed - Super Sweet Thursday #22 
Crafty Scrappy Happy - Crafty Scrappy Happy Me Thursday {23} 
The 36th Avenue - Party Time! 
Stuff & Nonsense - Fridays Unfolded #55 
Momnivore's Dilemma - Creative Juice #60 
Sassy Sites! - Party in the FFA! 
WhipperBerry - Friday Flair 
Thirty Handmade Days - Pity Party #76 
Freckled Laundry - Air Your Laundry Friday #55 
The Shabby Nest - Frugal Friday 
Redoux - Friday Link Up Party #44 
Simply Designing - Link Party 
Funky Junk Interiors - Saturday Night Special Link Party #122 
Craft Envy - Saturday Spotlight #78 
Be Different, Act Normal - Show And Tell Saturday 
Lolly Jane Boutique - Watch Got Weekend #52 
Little Becky Homecky - Fantabulous Friday #1 
Flamingo Toes - Think Pink Sundays No.50 
I Heart Nap Time - Sundae Scoop Link Party 
Brassy Apple - Make it Monday #20 
DIY Home Sweet Home - More The Merrier Monday #51 
It's So Very Cheri - It's Party Time 
Craft-O-Maniac - Craft-O-Maniac Monday Link Party #26 
I Should Be Mopping The Floor - Mop It Up Mondays #5 
Get Outta My Head Please - Show It Off Party #13 
Sew Can Do - Craftastic Link Party

Tuesday, 14 February 2012

Hearts and Flowers

So, Valentines Day is upon us once again!

Valentines Day in Canada is a much bigger deal than it is in Scotland, the kids all hand out Valentines to each of their classmates every year (In Scotland, it's Christmas cards, but they don't do that here in Canada - aye well, each to their own!)

The last 3 years I am ashamed to say they have handed out piddling little shop bought cards, so this year I decided to plan ahead and get them to make their own.  Here is what we came up with:


Paint sample bookmarks!  The above is but a glimpse, there are a few more...

I have to point out that I take absolutely no credit for this idea - I came across a website with paint chip valentines (sorry, I can't remember where) a while ago and then did some research - there are LOADS of sites on the internet where crafty people have made all sorts of different valentines using paint samples, some of them very clever and oh so sweet.  We decided (with 4 kids in the family!) to keep it simple and make bookmarks!


I broke out the hole punch, plus some other little punches (heart, flower, star), some different shaped stamps and red ink, valentine stickers, a few different glitter glues and some dollar store ribbon, and let the kids run amok.


Some of them are downright GLAM (my daughter has discovered a love of glitter glue which I'm sure will last a lifetime!!) while others are quite minimalist - it really depended on their mood while creating.


They had really great fun making these, I tried to limit them to 2 or 3 per day over the last couple of weeks so as not to make it too much of a chore, but most days when they got home from school the first thing out of their mouths (even before asking for something to eat, and THAT'S rare) was "Can we make some Valentines??"
FYI - these paint samples were collected over a few weeks and from different stores, I didn't clean any of the chain stores out of their samples.  Just sayin'.

Almost as an afterthought, the day before Valentines Day, it occured to me that the teachers should have something too.  I am really into using paper at the moment (see my Manga Dresser) in various ways, and I saw these really cool paper roses made from book pages at Market Nine Home, so thought I would give them a go!

I dug out an old romance novel (fitting, don't you think?) and followed the tutorial (and of course, had to add some of that GLAM glitter) and here is what I ended up with:


Personally, I like the unglittered look, but hey, they are for the kids teachers, and the kids can have their say...


Lucas chose "TARDIS" blue (of course) for his teacher...


Brodie went with traditional red...


Naomi has 2 teachers who job-share, so she went with silver and pink.  The pink is glitter glue while the blue, red and silver were done by painting white glue on the petals and then pouring over loose glitter.  My kitchen was very sparkly!

I had some containers that we got chinese food in a while ago, and they were perfect for these flowers!  We don't want them getting smooshed on the way to school...


Nikki x

Linked with:
Blue Cricket Design - Show and Tell 
Someday Crafts - Whatever Goes Wednesday #104 
Sew Much Ado - We Did It!  Wednesday 
Domestically Speaking link party 
The Trendy Treehouse 
Creations by Kara - Look What I Made link party 
Free Pretty Things For You - Whatever You Want Wednesday #64 
DIY By Design - Winter Blues Wednesday - It's a Party #52 
My Girlish Whims - Your Whims Wednesday #46 
Handy Man, Crafty Woman - Wicked Awesome Wednesday #50 
House of Hepworths - Hookin Up With HoH #87 
Somewhat Simple - Blog Link Party 
Tales From Bloggeritaville - Thrifty Thursday #148 
Katie's Nesting Spot - A Crafty Soiree #77 
The Shabby Creek Cottage - Link Party 
Beyond The Picket Fence - Under $100 Linky Party 
Suzy's Artsy Craftsy Sitcom - Commercial Break Thursday 
Between U & Me - Crazy Cute Link Party #38 
Thrifty 101 - DIY Thrifty Thursday #54 
The Brambleberry Cottage - Time Travel Thursday #84 
Allie Makes - Making It With Allie 
A Glimpse Inside - Catch A Glimpse Party #67 
Fabulously Flawed - Super Sweet Thursday Par-tay! 
Crafty Scrappy Happy - HUGE link party!

Wednesday, 8 February 2012

Manga Dresser

And so, the quest begins, to make my 8 year old son Brodie's bedroom much more fun than it currently is, and honestly, that won't be hard since it is dull, dull, dull!  I am trying to do this on as small a budget as possible, hopefully under $100.  Is this stupidly optimistic?  I guess we'll find out!

The first project I embarked upon - a Manga chest of drawers! Isn't it COOL!!?


So, here is what I started with.  A chest of drawers, which was given to us about a year ago by a friend, and was being used by my son in all of its chipped, white glory.


Some paint from freecycle


and a couple of nice, thick, black and white manga comics from Value Village.


I tackled the handles first.  After removing them from the drawers, I sanded and wiped them, then attached them to some cardboard so they would sit nicely without falling over during the painting process.


I cracked open that lovely freecycle paint as fully intended the paintwork on this project to be that nice, dark red.  However, this is what happened when I began to paint...


Yes, it was rather pink!  I don't think my son will appreciate a pink dresser in his bedroom.  Also, it was very translucent - it just wasn't going to work, I think the previous owner has mixed something into it.  So, I wiped it off and started again.  What did I learn?  When I get lovely free paint from freecycle, I may not be getting exactly what it says on the tin!  I cracked open a tin of green paint, from the same freecycler, and once I had established it was just good old regular paint, I made a(nother) start!

Once the handles were set aside to dry, we started getting the rest of the parts ready - we removed the drawers, sanded the fronts and put them aside, then started on the main body - I actually attracted a helper for this part!  No, this isn't Brodie, it's his older brother.  If you look closely in the background, you can see part of another dresser which I previously gave a good old overhaul to!


Once the sanding was finished, we got out some flyers and tape and taped off all the parts that I didn't want to paint - namely, the top and the two side panels, then got going with the green paint again!


It took 3 coats of paint until I was happy with the coverage (no pics of that stage, sorry) - then came the fun part!  Brodie and I went through the comics and randomly chose pages we liked.  For about a nanosecond I considered trying to have a flowing story, but it never would have worked since every other page would be the face-down part pasted to the wood.  So we just went with stuff we liked!  I cracked open the mod podge, and started to paste!


The side panels are sort of self-contained/recessed a bit, I did have to trim some little edges to get a good fit.  With the top, I made sure to get a nice, straight line at the front, then left the overhang at the back, but made sure to fold it over the edge to get a good fold line - hopefully the next picture will explain it better than I can.


This is the back edge of the dresser where the overhang was.  Once the mod podge was dry, I took my sanding block and sanded along the edge, which shears away the excess and gives a lovely, neat line.  The white you can see in this pic is the edge of the original white paint on the back on the dresser and dripping down the back a bit - the edge of the paper is really neat, honestly!

Then it was time for the drawers.  I again left the pages to overlap on all 4 sides and once it was dried, sanded the edges off.


A top coat of mod podge on the drawers and the main unit (comic book pages only, not paint) to seal it all, and finally 3 thin coats of spray varnish (during the varnish stage, I put some tape over the painted edges that met the comic book pages so they would stay matt and not get all varnishy!)  Finally, I reattached the handles, and voila!


Now, I have to be honest - despite much smoothing of the paper during the application stage, there are still some wrinkles here and there.  But I'm not going to let this bother me.  I think the finished product turned out pretty awesome.

Chest of Drawers - free
paint - free
comics - $1.99 each so $3.98 in total
flyers - free

Other items I bought for use in this project, and will use for others too as still have some left (so will add them to the running total):


tape - $1
mod podge - $10
varnish - $6

Total cost of Manga Chest of Drawers - $3.98

Total cost of room to date -  $20.98

Eek - project number one is under my belt, and a fifth of the budget already blown.  Not looking good for my $100 budget - I guess I have to go even cheaper on my plans!


You can see more about Brodie's bedroom makeover below:
The Bedroom of Doom!  Before the transformation began...

Linked with:

Sunday, 5 February 2012

The bedroom of doom!

Yep, it's pretty bad!

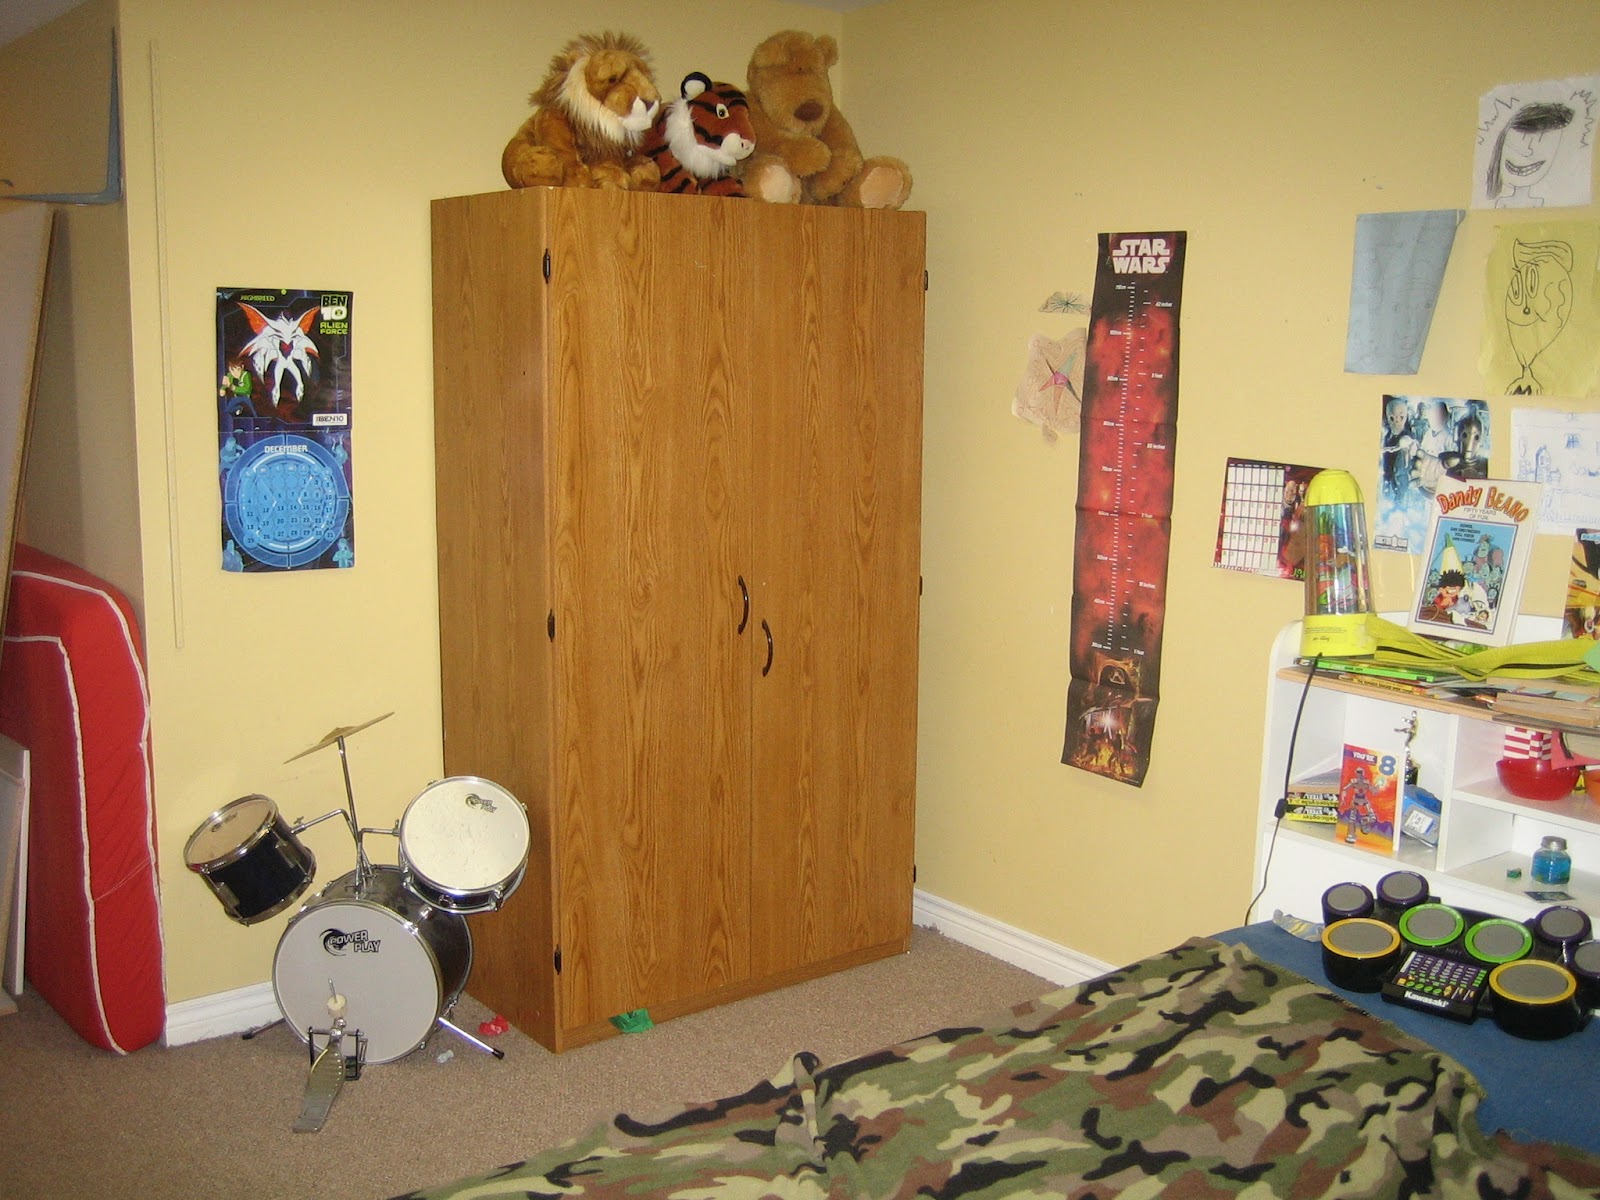
I really want to decorate all 4 of my kid's bedrooms this year, and am starting with Brodie's.  Brodie is 8 years old, but sadly his bedroom doesn't reflect this - in actual fact, every single room and hallway in our house (with the exception of the hubster and I's bedroom which is a disaster of a whole different colour) is painted this light mustardy tone - it is pretty inoffensive, but very, very dull.

I can't believe I am even publishing these pictures on the internet, but you can't have a good "reveal" without the pitiful "before pictures", eh?  So here goes.

These double doors are the entrance to his bedroom (on the other side of these is our family room) - yes there are TWO tellys in here - one doesn't have the necessary sockets for his little plug in video games, so he has a TV exclusively for gaming!  One will have to go in the revamp however...

I have to point out that no Brodie does NOT use a drum pad for a pillow, and his blankets are usually more extensive - last night was Saturday and he and his brother had a sleepover in the family room last night.


Here is the wall opposite the bed - the whole wall has a ledge running along it.  The black TV is on the floor as I already removed the first dresser to work on it - that will be in the next blog post!


And the next few shots are taken standing over by the tvs, showing the other end of the bedroom - his bedroom narrows into a corridor for the last part of it.


And here is the "corridor" part of the room - it has become something of a dumping ground in the last few weeks (this is why I am embarrased to share these pictures with you - what a midden, as we say in Scotland!)


The tall thing in the foreground is a piece of papier mache furniture I made about 2 years ago, and have yet to finish - I could never decide what I wanted to do!  That's a blog post for another day!

Below is a project that didn't turn out quite how I wanted - yes, it's a duct tape dresser!  It never did get finished, and once Brodie's TV went on top of it, the tape got all torn in places.  I bought some "goo gone" so I am hoping I'll be able to strip it back and re-do it for the new room.


 So, there you have it.  I am hoping that by the time I photograph this bedroom again, it will be a room of much awesomeness and colour.  Wish me luck!

Nikki x

Thursday, 5 January 2012

Hey! It's been a while...

I am embarassed to admit it has been something like 6 weeks since my last post on the blog.  Originally I was very busy trying to make some hand made gifts for my four children for Christmas so didn't have time for any new crafts to post, then it turned into a bit of a health saga - long story short, I have had psoriasis since my teens but always manageable - for some reason in mid-December I had the mother of all flare-ups and I went from a couple of patches on my torso to full on, 100% coverage, which is where I still am right now.  Anyhow, am waiting for a dermatologist appointment and have decided to try to pull myself out of the doldrums and have a positive outlook - and hopefully start crafting again!

I never did get the gifts finished for my kids, and think they are more likely to be Valentine or Easter gifts now!  I did get one finished, for my daughter, so am posting some pictures for you to have a look at.  Her name is "Miss Bitsy" because she is made up from bits of my daughters out-grown clothes - geddit?


She is entirely hand sewn using t-shirts, jammies, jeans, wool sweaters, dresses and trousers.


She took a LONG time to make!!


above is a close up of her tummy...


and this is her back.

Due to the length of time she took me to complete, I decided that for my three boys, the pattern would be simplified - instead of seperate arms and legs, they are more along the "cut two pieces the same shape and sew around the edges" ilk - I have all pieces cut and have begun sewing, and hope to share them with you at some point soon!

Incidentally, the other three are to be called "Patches", "Scrapper" and "Piece, Man" (my eldest son's favoute saying) - all along the same lines as "Miss Bitsy"!

I hope to be back blogging on a regular(ish) basis from now on, so please come back and see me soon!

Nikki x

Link with

Blue Cricket Design - Show and Tell!
Not Just a Housewife 
Coastal Charm - Nifty Thrifty Tuesday No. 95 
The Girl Creative - Just Something I Whipped Up 
Skip to my Lou - Made by you Monday 
Chic on a Shoestring - Flaunt it Friday No. 86 
French Country Cottage - Feathered Nest Friday 
Lovely Crafty Weekend #54 
504 Main - Tickled Pink No. 80 
Thirty Handmade Days - Pity Party #69 
Kojo Designs - Friday Fun Finds 
Fingerprints on the Fridge - Feature Yourself Friday 
Its a Hodgepodge Life - Hodgepodge Friday