Wednesday, 8 February 2012

Manga Dresser

And so, the quest begins, to make my 8 year old son Brodie's bedroom much more fun than it currently is, and honestly, that won't be hard since it is dull, dull, dull!  I am trying to do this on as small a budget as possible, hopefully under $100.  Is this stupidly optimistic?  I guess we'll find out!

The first project I embarked upon - a Manga chest of drawers! Isn't it COOL!!?


So, here is what I started with.  A chest of drawers, which was given to us about a year ago by a friend, and was being used by my son in all of its chipped, white glory.


Some paint from freecycle


and a couple of nice, thick, black and white manga comics from Value Village.


I tackled the handles first.  After removing them from the drawers, I sanded and wiped them, then attached them to some cardboard so they would sit nicely without falling over during the painting process.


I cracked open that lovely freecycle paint as fully intended the paintwork on this project to be that nice, dark red.  However, this is what happened when I began to paint...


Yes, it was rather pink!  I don't think my son will appreciate a pink dresser in his bedroom.  Also, it was very translucent - it just wasn't going to work, I think the previous owner has mixed something into it.  So, I wiped it off and started again.  What did I learn?  When I get lovely free paint from freecycle, I may not be getting exactly what it says on the tin!  I cracked open a tin of green paint, from the same freecycler, and once I had established it was just good old regular paint, I made a(nother) start!

Once the handles were set aside to dry, we started getting the rest of the parts ready - we removed the drawers, sanded the fronts and put them aside, then started on the main body - I actually attracted a helper for this part!  No, this isn't Brodie, it's his older brother.  If you look closely in the background, you can see part of another dresser which I previously gave a good old overhaul to!


Once the sanding was finished, we got out some flyers and tape and taped off all the parts that I didn't want to paint - namely, the top and the two side panels, then got going with the green paint again!


It took 3 coats of paint until I was happy with the coverage (no pics of that stage, sorry) - then came the fun part!  Brodie and I went through the comics and randomly chose pages we liked.  For about a nanosecond I considered trying to have a flowing story, but it never would have worked since every other page would be the face-down part pasted to the wood.  So we just went with stuff we liked!  I cracked open the mod podge, and started to paste!


The side panels are sort of self-contained/recessed a bit, I did have to trim some little edges to get a good fit.  With the top, I made sure to get a nice, straight line at the front, then left the overhang at the back, but made sure to fold it over the edge to get a good fold line - hopefully the next picture will explain it better than I can.


This is the back edge of the dresser where the overhang was.  Once the mod podge was dry, I took my sanding block and sanded along the edge, which shears away the excess and gives a lovely, neat line.  The white you can see in this pic is the edge of the original white paint on the back on the dresser and dripping down the back a bit - the edge of the paper is really neat, honestly!

Then it was time for the drawers.  I again left the pages to overlap on all 4 sides and once it was dried, sanded the edges off.


A top coat of mod podge on the drawers and the main unit (comic book pages only, not paint) to seal it all, and finally 3 thin coats of spray varnish (during the varnish stage, I put some tape over the painted edges that met the comic book pages so they would stay matt and not get all varnishy!)  Finally, I reattached the handles, and voila!


Now, I have to be honest - despite much smoothing of the paper during the application stage, there are still some wrinkles here and there.  But I'm not going to let this bother me.  I think the finished product turned out pretty awesome.

Chest of Drawers - free
paint - free
comics - $1.99 each so $3.98 in total
flyers - free

Other items I bought for use in this project, and will use for others too as still have some left (so will add them to the running total):


tape - $1
mod podge - $10
varnish - $6

Total cost of Manga Chest of Drawers - $3.98

Total cost of room to date -  $20.98

Eek - project number one is under my belt, and a fifth of the budget already blown.  Not looking good for my $100 budget - I guess I have to go even cheaper on my plans!


You can see more about Brodie's bedroom makeover below:
The Bedroom of Doom!  Before the transformation began...

Linked with:

Sunday, 5 February 2012

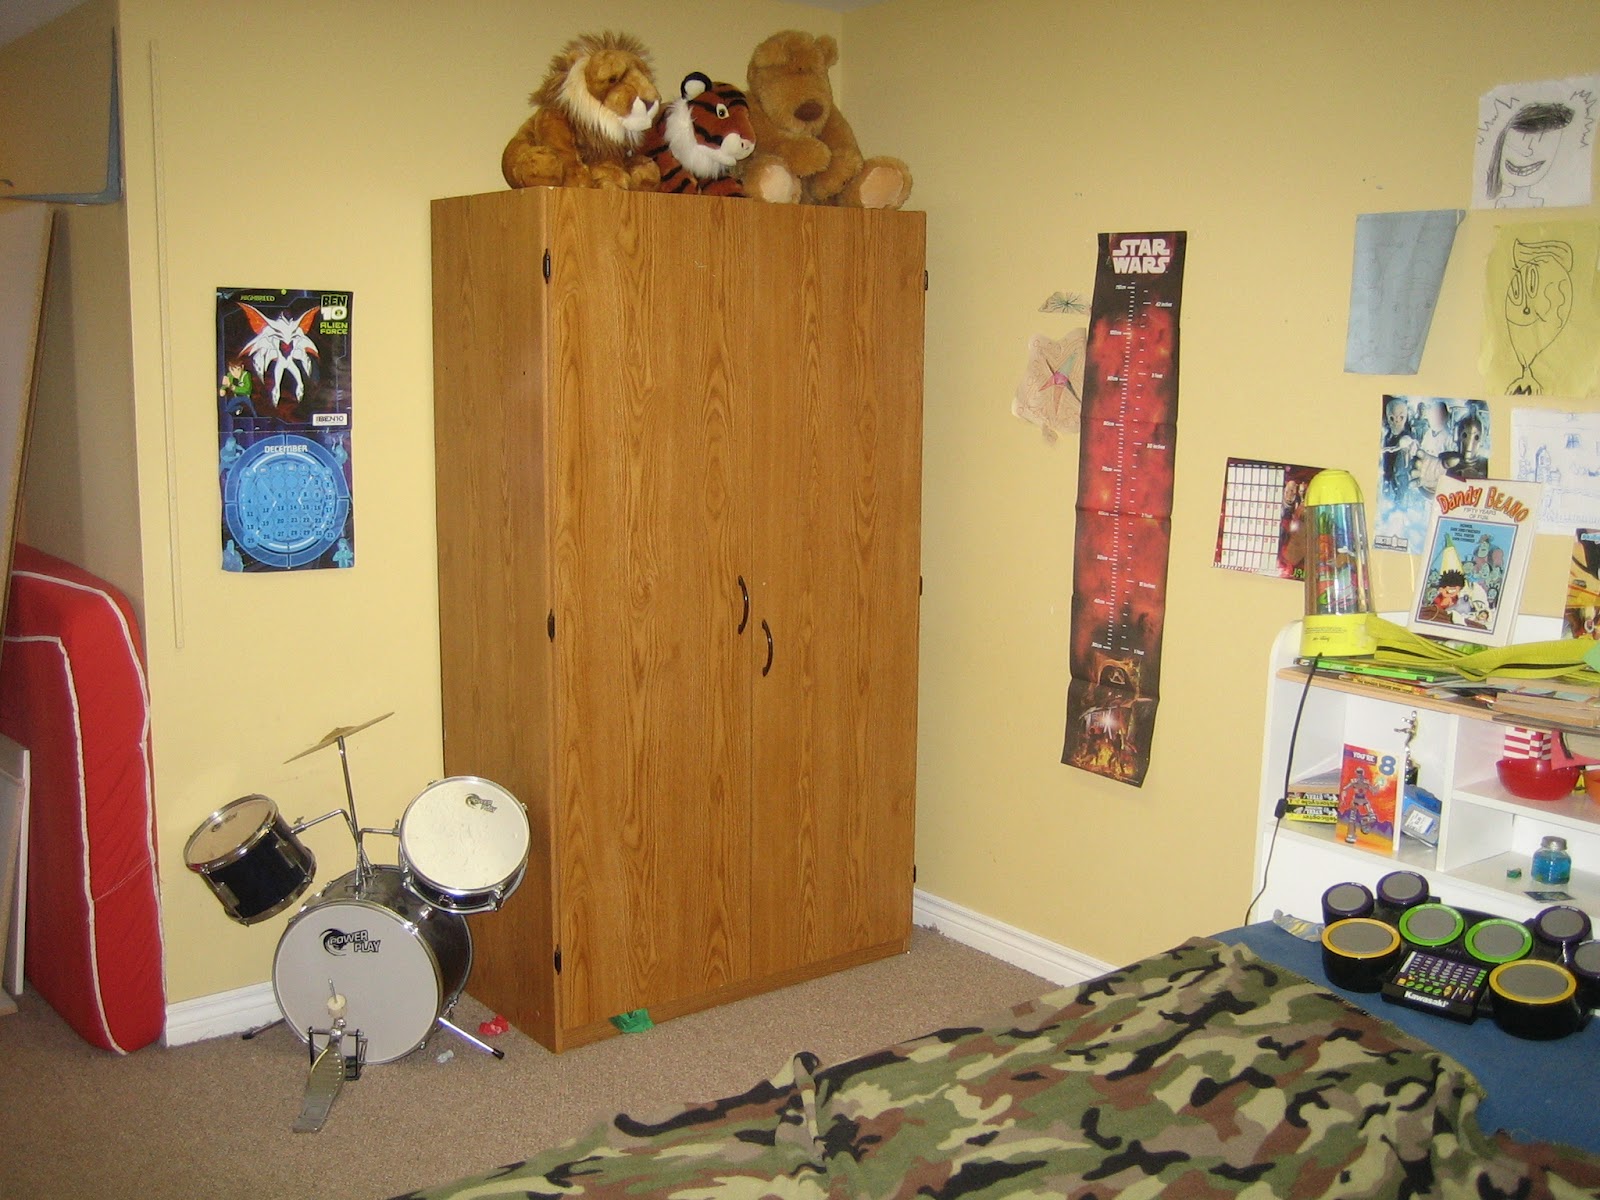
The bedroom of doom!

Yep, it's pretty bad!

I really want to decorate all 4 of my kid's bedrooms this year, and am starting with Brodie's.  Brodie is 8 years old, but sadly his bedroom doesn't reflect this - in actual fact, every single room and hallway in our house (with the exception of the hubster and I's bedroom which is a disaster of a whole different colour) is painted this light mustardy tone - it is pretty inoffensive, but very, very dull.

I can't believe I am even publishing these pictures on the internet, but you can't have a good "reveal" without the pitiful "before pictures", eh?  So here goes.

These double doors are the entrance to his bedroom (on the other side of these is our family room) - yes there are TWO tellys in here - one doesn't have the necessary sockets for his little plug in video games, so he has a TV exclusively for gaming!  One will have to go in the revamp however...

I have to point out that no Brodie does NOT use a drum pad for a pillow, and his blankets are usually more extensive - last night was Saturday and he and his brother had a sleepover in the family room last night.


Here is the wall opposite the bed - the whole wall has a ledge running along it.  The black TV is on the floor as I already removed the first dresser to work on it - that will be in the next blog post!


And the next few shots are taken standing over by the tvs, showing the other end of the bedroom - his bedroom narrows into a corridor for the last part of it.


And here is the "corridor" part of the room - it has become something of a dumping ground in the last few weeks (this is why I am embarrased to share these pictures with you - what a midden, as we say in Scotland!)


The tall thing in the foreground is a piece of papier mache furniture I made about 2 years ago, and have yet to finish - I could never decide what I wanted to do!  That's a blog post for another day!

Below is a project that didn't turn out quite how I wanted - yes, it's a duct tape dresser!  It never did get finished, and once Brodie's TV went on top of it, the tape got all torn in places.  I bought some "goo gone" so I am hoping I'll be able to strip it back and re-do it for the new room.


 So, there you have it.  I am hoping that by the time I photograph this bedroom again, it will be a room of much awesomeness and colour.  Wish me luck!

Nikki x

Thursday, 5 January 2012

Hey! It's been a while...

I am embarassed to admit it has been something like 6 weeks since my last post on the blog.  Originally I was very busy trying to make some hand made gifts for my four children for Christmas so didn't have time for any new crafts to post, then it turned into a bit of a health saga - long story short, I have had psoriasis since my teens but always manageable - for some reason in mid-December I had the mother of all flare-ups and I went from a couple of patches on my torso to full on, 100% coverage, which is where I still am right now.  Anyhow, am waiting for a dermatologist appointment and have decided to try to pull myself out of the doldrums and have a positive outlook - and hopefully start crafting again!

I never did get the gifts finished for my kids, and think they are more likely to be Valentine or Easter gifts now!  I did get one finished, for my daughter, so am posting some pictures for you to have a look at.  Her name is "Miss Bitsy" because she is made up from bits of my daughters out-grown clothes - geddit?


She is entirely hand sewn using t-shirts, jammies, jeans, wool sweaters, dresses and trousers.


She took a LONG time to make!!


above is a close up of her tummy...


and this is her back.

Due to the length of time she took me to complete, I decided that for my three boys, the pattern would be simplified - instead of seperate arms and legs, they are more along the "cut two pieces the same shape and sew around the edges" ilk - I have all pieces cut and have begun sewing, and hope to share them with you at some point soon!

Incidentally, the other three are to be called "Patches", "Scrapper" and "Piece, Man" (my eldest son's favoute saying) - all along the same lines as "Miss Bitsy"!

I hope to be back blogging on a regular(ish) basis from now on, so please come back and see me soon!

Nikki x

Link with

Blue Cricket Design - Show and Tell!
Not Just a Housewife 
Coastal Charm - Nifty Thrifty Tuesday No. 95 
The Girl Creative - Just Something I Whipped Up 
Skip to my Lou - Made by you Monday 
Chic on a Shoestring - Flaunt it Friday No. 86 
French Country Cottage - Feathered Nest Friday 
Lovely Crafty Weekend #54 
504 Main - Tickled Pink No. 80 
Thirty Handmade Days - Pity Party #69 
Kojo Designs - Friday Fun Finds 
Fingerprints on the Fridge - Feature Yourself Friday 
Its a Hodgepodge Life - Hodgepodge Friday

Thursday, 17 November 2011

Christmas is coming...

Well, it's not long really, is it?!

The time is coming for the mantel to be re-done for Christmas time, so I have started on some crafts to adorn it.  And what says Christmas more than Christmas trees?


I do like to use things I have to hand wherever possible.  Last week we got rid of an old double bed, so of course I removed the legs from the base before it was thrown out!  I removed the threaded pieces from the bottom where they were attached to the bed, and thought they had a vaguely Christmas tree shape.


I got out my green and red craft felt.  After applying white glue to the entire leg, I placed it on the felt and rolled it up, then left them all to dry - the red ones were done a little later so only the green are shown here.


Once all 6 were dry, I trimmed the felt around the bottom, up the back "seam (which needed another bit of white glue to get it to stick properly on most of them) and the top I trimmed about 3/4 inch from the top of the actual wooden leg.

To finish the top, I snipped from the top of the felt to the top of the leg 4 or 5 times and then using hot glue, glued each piece down to cover the top of the wood.  Here they are all ready to be decorated!


The decorating was super quick thanks to my glue gun - I gathered up a few craft bits and bobs in red, green and gold (yes, I am going for the traditional Christmas colours this year), and here's what I came up with:

For the first one I used a spare piece of ribbon left over from last year - I glued it at the top then wound it around, finishing by gluing and trimming at the bottom.


Next, I used some little jewel stickers which I originally bought for my spooky spider eyes back before Halloween - luckily, the majority of the pack was green, red and a pale green/gold.


Next up was some gold craft thread - similar to the ribbon tree, I glued it at the back then wound it around before finishing it again with glue at the back.


Then I raided the button box looking for red, green and gold buttons - I didn't find any gold ones but did find some interesting green and red ones - trusty old glue gun again, and voila!


I had a small length of red ribbon from somewhere - I decided this one should have a bow tied around it to look like a Christmas tree present!  I say "tied" in the loosest sense of the word, I am a bit rubbish at tying bows so I assembled a nice neat one with hot glue and then attached it on top of a ribbon band I glued to the tree itself.


Last but not least, I gathered the green scrap felt I had left over plus one other mid-shade of green, and cut some narrow lengths.  I again glued them with hot glue, starting and finishing at the back seam.


This project was so super easy and quick, the only lengthy part was waiting for the white glue to dry on the wooden legs - if you do this part before bed and let it dry over night, all to the better!

You may not have spare bed legs lying around(!) but fear not, this could be easily achieved with rolled up cereal box card, or foam cones are pretty cheap at the dollar store or craft store - if you go down that route, you could also use pins and sequins to decorate, I obviously couldn't stick pins into the wood...

I like this little collection of Christmas trees!  I swithered about finishing them at the top with stars, but decided against it.  I may change my mind when they actually go up on the mantel.


They don't look fantastic from the back, but hey, who's gonna see the back?  I think they look awesome from the front, and that's the main thing!!

Nikki x

Linked with


Chic on a Shoestring - Flaunt it Friday #79
Remodelaholic's Annonymous #97 
French Country Cottage - Feathered Nest Friday 
Simply Designing - Simply Link Party 
It's Fun To Craft - "Look At Me" Party!!! 
Someday Crafts - Giveaway Directory 
Lovely Crafty Home - Lovely Crafty Weekend #47 
504 Main - Tickled Pink #74 
At The Picket Fence - Inspiration Friday 
Tater Tots and Jello - Weekend Wrap Up Party 
Be Different Act Normal - Show And Tell Saturday 
Craft Envy - Saturday Spotlight #68 
Uncommon Design - Home For The Holidays

Sunday, 13 November 2011

The most fantabulous coat in the world...EVER!

I have been a fan of Katwise on Etsy for some time, her garments are simply, jaw droppingly gorgeous.  Well, just look!!


I mean - just LOOK at it!  Words fail me.  Look at the awesome length of the hood!  Look at that magical flare as Kat spins around!  Look at the WONDEFRFUL colours! I simply must posess one!  And this is Kat's house in the background of the shot - WOW!!

These have proved so popular, that they sell out pretty much immediately - however, Kat is now offering a tutorial in her Etsy shop which I eagerly snapped up for a mere $9 - it is a wonderful read full of photos, tips and insights into Kat herself.  It's just as colourful as her wonderful clothing too - what an amazingly talented woman!


I don't know if I will ever get around to making one, although I'd love to for both myself and my daughter - however at the moment, I don't even own a sewing machine, let a lone a serger!  Kat mentions in the tutorial that while it is possible to do it by hand, it will take a LONG time and the sweater pieces may unravel at the edges :O(


In the meantime, I will thoroughly enjoy re-reading this tutorial whenever I need a colour pick-me-up, will continue to make my own far more modest projects (hand sewn, of course!) from my felted sweater stash, and maybe one day down the line when I have all the necessary equipment, I'll be the talk of the town wearing my very own elf coat everywhere I go!


Kat is always so friendly the few times I have spoken to her via email, and I am in awe of her talents!

For an instant shot of colour and fun which is sure to make you smile, check out Kat's website and her Etsy shop.  Happy browsing!

Nikki xxx

Tuesday, 8 November 2011

Autumn Mantel

As mentioned previously, my Halloween bits and pieces were packed away on the morning of November 1st, but I couldn't leave my mantel bare, so whipped up a quick Autumn mantel in it's place!


I put this together in just a couple of hours, including craft time - not too bad, I think!  My base for the mantel was an Alpaca pashmina which sneaked into the wash and was felted - the brown colour gives a nice autumnal feel.
First up was a project similar to my Boo Halloween artwork - I had a further 3 left over wooden frames, so I painted one red, one yellow and one orange, then finished then with a brown wash which was wiped off with kitchen paper, to make them less bright.


For the frame insert, this time I used paper lunch bags glues to the card from the aperture - once it was dry, I dry-brushed some brown craft paint on before cutting to size and re-inserting in the frame.  They were finished with some leaves from the pile I made last week (see below).


I got out my hot glue and a big box of twigs and driftwood I have collected throughout the year - they have all been well dried, I don't recommend crafting with new wood and glue as it has yet to dry and settle - and made a wreath which I hung over the mirror with some gold ribbon.


I knew the leaves from my Fall Table Runner (kind of) would be nice and versatile - I'd like to tell you I made a whole new pile, but no - I swpied them from the kitchen table and scattered then along the mantel.  I held a few back and added some thread to them, to hang from my driftwood and twig "tree".


Finished with a couple of pillar candles, my Paper Lunchbag Pumpkin and a small lamp, I am pretty pleased with the overall result, and I guess this will stay up until December when I re-do it all again for winter/Christmas.  I am so glad we got this mantel, it's fun to decorate!


Nikki x

Linked with

Oops, I Craft My Pants - "Tute"-in Tuesday
Coastal Charm - Nifty Thrifty Tuesday #87 
The Girl Creative - Just Something I Whipped Up 
Making The World Cuter Monday 
Sumo's Sweet Stuff - Market Yourself Monday 
Craft-O-Maniac - Monday Link Party 
Skip To My Lou - Made By You Monday 
Dittle Dattle - Amaze Me Monday #48

Thursday, 3 November 2011

TARDIS junk art

Today I was planning on showing you my fall mantel - all the Halloween decorations were taken down first thing Tuesday (I hate keeping decor up once the event is over, I have to grind my teeth to keep the Christmas tree up until after New Year) but no such luck - I find myself without a working camera - Grrrr!

My little point-and-shoot seems to have a wonky charger - sometimes it works, sometimes it doesn't.  This week it doesn't, even my pictures of the kids in their Halloween costumes are trapped on there :O(  I'll keep working on it.

I would dearly love to buy a fancy big SLR digital, but it's just not feasible at the moment.  So, I had a look on kijiji yesterday and ended up with another little point-and-shoot, just to tide me over.  I picked it up today to take some pics and there is no memory card!!  I really wish the seller had mentioned this...

I am hoping by the weekend I will either a) have the charger working for the old camera, or b) an SD card for the newer camera, and I can show you my Autumn mantel!  In the meantime, this is the only thing I currently have pics of on my laptop, which you haven't already seen - junk art!

It's not much of a tutorial, but you don't really need one for junk art - just go with the flow!


Junk art is great fun, for kids and adults alike (although kids may be better with white glue instead of hot glue) - it's great to get the imagination working!  There really are no limits to what you can make, it doesn't have to be WHO related!

I had a plain wooden frame which I painted a dark red, and then the board which is the backing of the frame I painted directly with blue, getting lighter towards the middle.  You can see the texture of the board in the picture above.

I drew a rough shape of the TARDIS/11th Doctor Logo and raided my junk pile - I keep all sorts of weird garbage like pieces of plastic, zippers, broken things etc, just for this purpose!  I played around with the layout and broke out the hot glue.  FYI, you can see the logo better if you squint your eyes, haha!


Some of the "ingredients" for this were: broken crayons, pieces of kinder toys, broken beads, pieces from an old board game, marker lids, those black plastic thingys which have twist ties wrapped through them in new toy packaging, a plastic bubble blower, glass beads, zipper pulls and more.  I keep a box of empty ice cream tubs where I sort things by colour, I throw things in there as I come across them - I have even been known to pick things up off the street and bring them home to wash them!

It was finished with a silver sharpie which I used to write "Bigger On The Inside" (which, of course, it is!) and some random dots to represent stars in space.


And that's pretty much it!  I have another few pieces of junk art I'd love to share with you, when I can get some pictures of them!  Have you ever made juk art?

Nikki x

Linked with

Momnivore's Dilemma - Creative Juice Thursday #46
Somewhat Simple - Strutt Your Stuff 
Fireflies And Jellybeans - Show Off Your Stuff #99 
The Shabby Creek Cottage - Transformation Thursday 
Seven Thirty Three - What Are Little Boys Made Of? #84 
Hooking Up With House of Hepworths #73 
Blue Cricket Design - Show And Tell 
The Trendy Treehouse - Create and Share 
Oops, I Craft My Pants - "Tute"-in Tuesday 
Bella Before Abd After - Amaze Me August #61